System Administrator's Guide/Next Steps: Difference between revisions
From Mahara Wiki
< System Administrator's Guide
(Created page with "After you've installed your Mahara, you might be wondering what you can do next. Here are some suggestions that may give you some ideas. Though feel free to dive in and play if y…") |
No edit summary |
||
| Line 3: | Line 3: | ||
<div id="section_1"> | <div id="section_1"> | ||
== Register on mahara.org == | ==Register on mahara.org== | ||
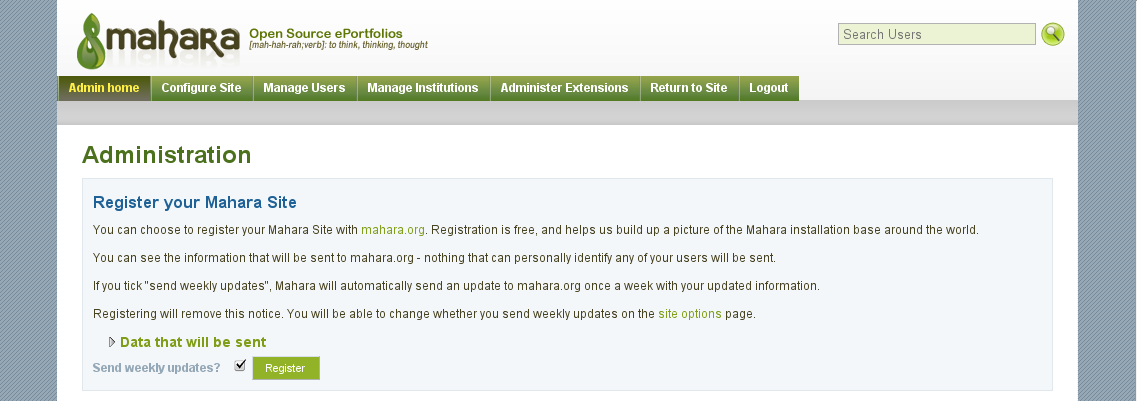
[[Image:=register-your-mahara.png|register-your-mahara.png]]When you visit the administration section for the first time, you'll be presented with the option of registering on mahara.org. You certainly don't have to, but registering helps us gather a picture of how Mahara usage is growing around the world :). No information that would personally identify any of your users will be sent to us, and it doesn't cost any money to register. | [[Image:=register-your-mahara.png|register-your-mahara.png]]When you visit the administration section for the first time, you'll be presented with the option of registering on mahara.org. You certainly don't have to, but registering helps us gather a picture of how Mahara usage is growing around the world :). No information that would personally identify any of your users will be sent to us, and it doesn't cost any money to register. | ||
| Line 11: | Line 11: | ||
</div><div id="section_2"> | </div><div id="section_2"> | ||
== Install a Language Pack == | ==Install a Language Pack== | ||
Mahara ships only with an English language pack, but you can download and install support for other languages. You install language packs in a subdirectory of your dataroot directory, called "langpacks". | Mahara ships only with an English language pack, but you can download and install support for other languages. You install language packs in a subdirectory of your dataroot directory, called "langpacks". | ||
| Line 27: | Line 27: | ||
</div><div id="section_3"> | </div><div id="section_3"> | ||
== Install a Theme == | ==Install a Theme== | ||
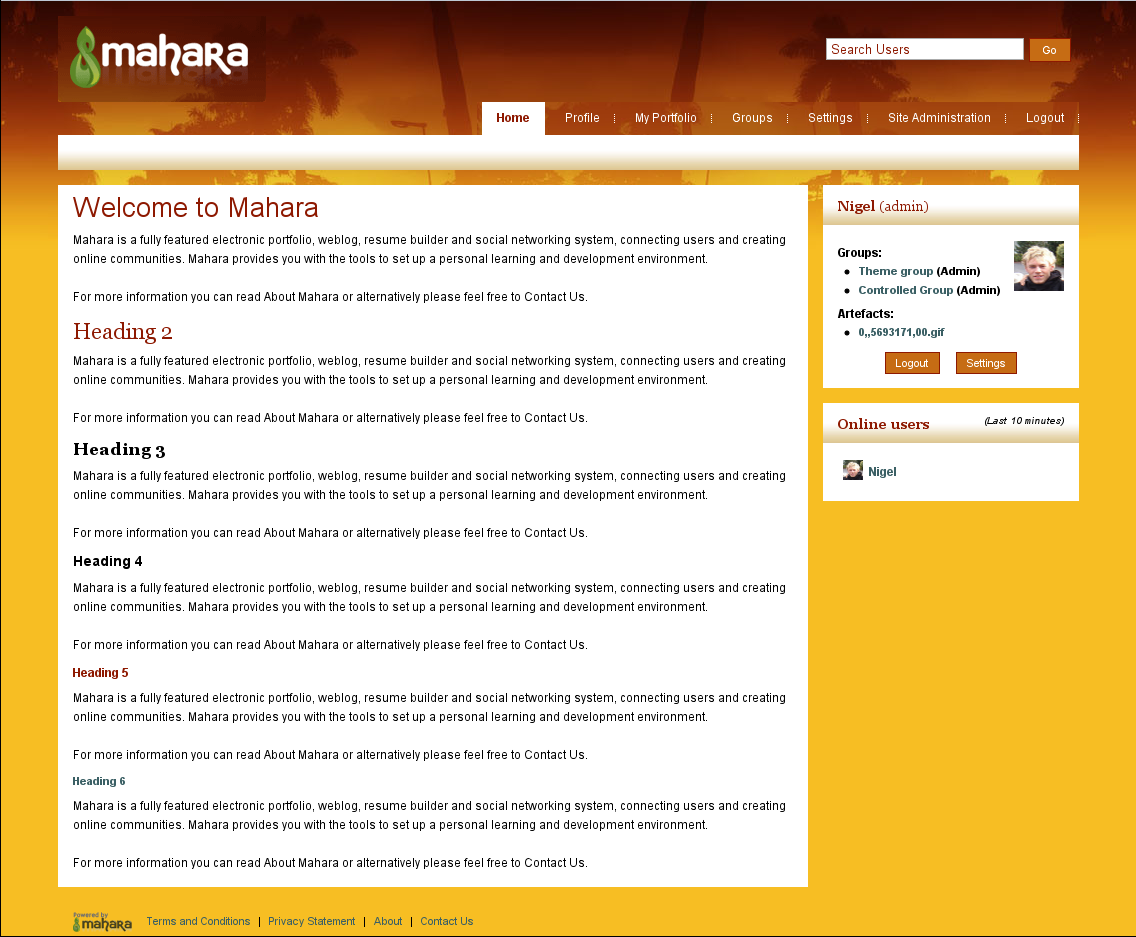
[[Image:=sunset-theme.png|sunset-theme.png]]Mahara 1.2 ships with six themes, and [[Themes|you can download more]]. | [[Image:=sunset-theme.png|sunset-theme.png]]Mahara 1.2 ships with six themes, and [[Themes|you can download more]]. | ||
| Line 35: | Line 35: | ||
</div><div id="section_4"> | </div><div id="section_4"> | ||
== Browse the Plugins == | ==Browse the Plugins== | ||
Mahara has a [[Plugins|growing list of plugins]]. Have a look through them, and see if any would be suitable for your installation. | Mahara has a [[Plugins|growing list of plugins]]. Have a look through them, and see if any would be suitable for your installation. | ||
| Line 43: | Line 43: | ||
</div><div id="section_5"> | </div><div id="section_5"> | ||
== Fill out your Profile == | ==Fill out your Profile== | ||
If you're going to be using the admin account for day-to-day use, fill out your profile, as an example for other users. You should also edit your Profile Page, and change its layout to suit you using the drag & drop system. Also, you could upload a profile icon so others will easily recognise your content throughout the system. | If you're going to be using the admin account for day-to-day use, fill out your profile, as an example for other users. You should also edit your Profile Page, and change its layout to suit you using the drag & drop system. Also, you could upload a profile icon so others will easily recognise your content throughout the system. | ||
| Line 49: | Line 49: | ||
</div><div id="section_6"> | </div><div id="section_6"> | ||
== Set up Moodle Integration == | ==Set up Moodle Integration== | ||
[[Image:=mahoodle.jpg|mahoodle.jpg]]Do you have a Moodle installation that you want to link with your new Mahara? Check out the [[System Administrator's Guide/Moodle//Mahara Integration|instructions for integrating Mahara and Moodle]]. | [[Image:=mahoodle.jpg|mahoodle.jpg]]Do you have a Moodle installation that you want to link with your new Mahara? Check out the [[System Administrator's Guide/Moodle//Mahara Integration|instructions for integrating Mahara and Moodle]]. | ||
| Line 55: | Line 55: | ||
</div><div id="section_7"> | </div><div id="section_7"> | ||
== Start Building your Portfolio == | ==Start Building your Portfolio== | ||
With all that "admin" stuff out the way, it's time to play! Start a blog, fill out your resume, upload some files and start creating your portfolio! | With all that "admin" stuff out the way, it's time to play! Start a blog, fill out your resume, upload some files and start creating your portfolio! | ||
Revision as of 16:46, 11 Mayıs 2011
After you've installed your Mahara, you might be wondering what you can do next. Here are some suggestions that may give you some ideas. Though feel free to dive in and play if you like!
Register on mahara.org
register-your-mahara.pngWhen you visit the administration section for the first time, you'll be presented with the option of registering on mahara.org. You certainly don't have to, but registering helps us gather a picture of how Mahara usage is growing around the world :). No information that would personally identify any of your users will be sent to us, and it doesn't cost any money to register.
To register, simply click the "Register" button you see on the administration homepage.
Install a Language Pack
Mahara ships only with an English language pack, but you can download and install support for other languages. You install language packs in a subdirectory of your dataroot directory, called "langpacks".
To install a language pack:
- Make sure you have a "langpacks" directory inside your dataroot directory - one should have already been created for you.
- Download the language pack you want to install from the language packs page.
- Decompress the downloaded TGZ archive.
- Copy the obtained directory to the 'langpacks' directory inside your dataroot.
- If the directory you put inside the dataroot 'langpacks' directory has a name like 'mahara-lang-xy', rename it to 'xy.utf8'.
Now you will be able to visit the Site Administration of your Mahara and choose the appropriate default language. Users will also be able to choose what language they see in their settings.
Install a Theme
sunset-theme.pngMahara 1.2 ships with six themes, and you can download more.
To install, download a theme, then extract it in Mahara's 'theme' directory. You will then be able to go to the Site Options page and choose a default theme for the site.
Browse the Plugins
Mahara has a growing list of plugins. Have a look through them, and see if any would be suitable for your installation.
To install, download a plugin, then decompress it in the appropriate plugin type directory. For example, if you download an artefact plugin, decompress it in the 'artefact' subdirectory.
Fill out your Profile
If you're going to be using the admin account for day-to-day use, fill out your profile, as an example for other users. You should also edit your Profile Page, and change its layout to suit you using the drag & drop system. Also, you could upload a profile icon so others will easily recognise your content throughout the system.
Set up Moodle Integration
mahoodle.jpgDo you have a Moodle installation that you want to link with your new Mahara? Check out the instructions for integrating Mahara and Moodle.
Start Building your Portfolio
With all that "admin" stuff out the way, it's time to play! Start a blog, fill out your resume, upload some files and start creating your portfolio!


